

Today is my birthday. Another year around the sun. I love to share things like pies and baked treats, books I’m reading, music I love, garden tips, and thoughts about life with you so to celebrate the day with you I’m sharing this short and hopefully fun video I made on how to roll dough.
I’ve made the decision to archive the Art of the Pie website. My plan is to gradually transfer the recipes I’ve created and posted over there to my new Substack home here. I’ll be setting up an Index page for you with links to the recipes as they are added here. As dough is near and dear to my heart, I’ll start off my new year sharing the dough I created and have taught since 2008.
Some of you have been to my in-person workshops and have baked with me at Pie Cottage or in kitchens across North America. I do look forward to the time when I can safely offer in-person Pie Camps again. Until that time, I am thrilled that my virtual workshops are continuing to grow. I’m a far cry from the girl who was sure she would never ever embrace the computer world but what I have learned over all these decades is that those words never say never are so darn true. Virtual classes have allowed me to reach folks all over the world who bake right along with me in their own kitchens, using their own equipment and ovens. So no matter what, I will absolutely keep virtual classes going and expand on them, too.
Recipe: Art of the Pie Dough
Makes one double-crust pie or two single-crust pies for 9" pie pans
2-1/2 cups (363 g) unbleached all purpose flour1
1/2 tsp (3 g) salt
8 Tbs (112 g) salted or unsalted butter, cut into tablespoon size pieces
8 Tbs (112 g) leaf lard2
8 Tbs (118 g) of ice water (This is an average but sometimes the dough takes more or less.)
Procedure
Put all ingredients but the ice water in a large bowl.
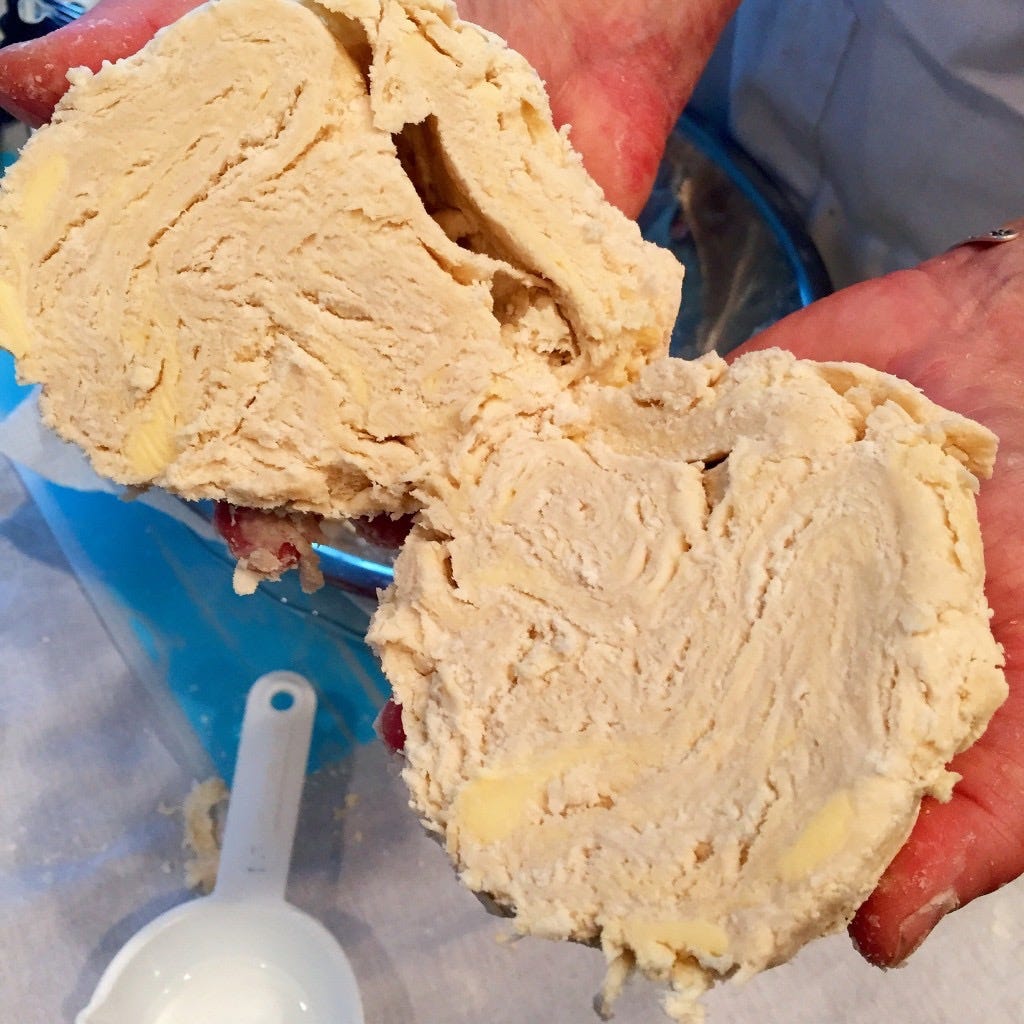
With clean hands, blend the mixture together until it looks like coarse meal with some lumps in it that looks like cracker crumbs, peas, and almonds. The lumps make flakey pies.
Sprinkle ice water over mixture and stir lightly with a fork.
Squeeze a handful of dough together. Mix in a bit more water if it doesnʼt keep together.
Divide the dough in half and make two chubby disks about 5 inches across.
Wrap the disks separately in plastic wrap and chill for about an hour.
Take out one disk and put it on a well-floured board, pastry cloth, parchment paper or plastic wrap.
Sprinkle some flour onto the top of the disk. Thump the disk with your rolling pin several times.
Turn it over and thump the other side.
Sprinkle more flour onto the top of the crust if needed to keep the pin from sticking and roll the crust out from the center in all directions.
When it is an inch or so larger than your pie pan, brush off the extra flour on both sides. Fold the dough over the top of the pin and lay it in the pie pan carefully.
Donʼt worry if the crust needs to be patched together; just paint a little water where it needs to be patched and “glue” on the patch piece.
Put the filling in the pie and repeat the process with the other disk.
There are a lot of recipes out there for pie dough. I’ve had great success with this simple one. It’s simple and basic. For those who would like detailed step-by-step instructions on how I make dough, read on.
How to Make Pie Dough
I like to keep things simple in my life. Pie dough is no exception. Flour, salt, fat, water. Four words. A simple mantra that I repeat when making dough.
Equipment You Will Need
A big bowl, one that is big enough to get your hands into comfortably. A 6-quart size is great.
A knife
A fork (optional, use your hands if you like…really.)
Put the bowl and flour into the freezer. “What?”, you say. “In the freezer?” Yup, I keep a mixing bowl in the freezer all the time along with a bag of flour and my pastry cloth. It helps everything stay chilled and keeps my fats…and me…from melting especially on hot days.
Kate’s Rule #1 of Pie and Life:
Keep everything chilled…especially yourself.
Measuring
This may blow your mind but I’m not an exact measurer. I don’t sift, fluff or mix the flour. I just dip in with a metal cup that I bought for five cents at a yard sale. It’s my cup. I’ve also found that a standard coffee cup (not mug) measures pretty close to one cup! Exact measuring is needed for cakes, but pie dough…at least mine…is pretty forgiving. A little extra here or there…and it all comes out ok.
Put about 2-1/2 cups of flour (363 g with my measuring equipement which may sound like over 2-1/2 cups but all measuring equipement is not equal so that’s what I use) in the chilled bowl. Add some salt—a half a teaspoon is about enough, and that finishes up the dry ingredients. Let’s go on to fats.
Fats
There’s much talk about what is the best fat to put in pie. My grandmother, Geeg, swore by “the- stuff-in-the-blue-can-which-shall-remain-nameless”. But as I came of age in the 1960’s, my “Mother Earth” leanings moved me swiftly away from that product. I’ve sinced mellowed so if you want to use half butter and half Crisco, it’s fine.
As for butter, you can use either salted or unsalted. I don’t adjust for salt in the recipe—1/2 teaspoon works fine either way. I use foil wrapped European style butter when possible, like Kerrygold, but if none are available where you are, don’t let this stop you from making pie. Use a paper wrapped butter. Just be sure to use real butter, either foil wrapped or paper wrapped. OK?
Cut (or weigh) the butter brick at about the 8 tablespoons (112 g) which is the same as one stick or 1/2 cup of butter. Then chunk it up into 6-8 big pieces. Now add, the same amount (8 tablespoons/112 g/ 1/2 cup) of leaf lard or Crisco and chunk them up, too.
Making the Dough
Think good thoughts before you put your hands in the bowl and make sure they are cold. If it’s hot out, put a bowl of ice water out on the kitchen counter and dip your hands in for a minute to chill them out. Dry them off .
Cold hands + Warm heart = Good pastry maker.
Put your hands in and smoosh the fat into the flour. Just rub the cold fat into the cold flour with your cold hands. Work quickly and don’t overthink this. When the flour, salt and fats appear to have the sizes of cracker crumbs, peas, almonds and maybe a few small walnut meats, you are finished.
Add water. Not too much and nor too little. Generally recipes call for somewhere between 6-8 tablespoons of water although it can be a little less or little more.
Have you ever made a dough and felt like YOU are the one who must be wrong because even though you followed everything that the recipe said to do, it just doesn’t turn out right? You are not wrong. The recipe just did not give you enough information. This is the art of making a pie. It seems that every day and every dough require a different amount of water even if it is the same recipe!
3-2-1
Add the ice water next and be sure that the ice doesn’t get into the bowl. If it does, when your finished dough is chilling, the ice will have melted and you will find a “mookie-mess” inside. (Another highly technical term.)
Mookie-mess: What your dough will roll out like if pieces of ice are left to melt inside of it.
Sprinkle 3 tablespoons of water over the dough in the bowl and then move it around lightly with a fork or with your hands. Don’t spend a lot of time in there. You aren’t making cookie dough; you are just moving the water around so that it is in all parts of the bowl. Squeeze a handful of dough with your hand to see if it holds together. If it doesn’t hold together in one place, it’s probably not going to hold together in another place and all you will be doing is warming up the fat so just one squeeze pleeze. Remember Rule #1.
Sprinkle 2 Tablespoons in the bowl and move the water around. Squeeze a handful. Does it hold together easily?
Sprinkle 1 Tablespoon over the dough and move it around with your fork. Keep adding a spoonful at a time until your fork starts to feel a bit sluggish in the bowl. The dough should keep together in your hand and feel moist. Pull it all together and compress into a big ball. It should feel like cool clay or play-dough.
Cut the dough in half and shape it into two chubby discs. When Saveur Magazine printed my recipe, they changed chubby to thick. Oh well. Chubby makes me think of my son’s sweet apple cheeks when he was a little boy and is a very happy word for me, so chubby it is. Wrap the disks tightly in bees wax wrap, wax paper or plastic wrap. Let rest and chill in the fridge for about an hour. The minumum amont of time is 20 minutes. During that time you can make the filling for your pie and have a cup of tea.
Rolling Out the Dough
Bring the dough out of the fridge. If it feels hard and solid, let it rest at room temperature until it feels a bit pliable and you can push you thumb in and see a belly button.
Now some of you may be trembling at the thought of rolling out pie dough. Dough wants to please you. If you say to it, “My pie dough always falls apart”, indeed, you have given it it’s marching orders. Instead, think about other things: A beautiful rose, a stunning sunset, the first time your baby smiled at you…let the dough know that it is going to be just perfect no matter what.
Dough is kind of like life. The path isn’t always smooth. Sometimes what feels like an insurmountable boulder blocks our path but we always find a way over, under or around. It may not turn out exactly as planned, but it will be perfect none the less but perhaps in a different way than you expected. Not to worry. There is always a way. Just keep going. It will be fine. Try and keep this in mind as you approach the dough.
I roll out on a pastry cloth but really most anything is fine. Marble, wood, plastic, freezer wrap or wax paper. As for a rolling pin, I use a French tapered pin but again there are many options. Wine bottles, canning jars work just fine, too!
Place a generous hand-full of flour onto the pastry cloth. Unwrap one chubby disc and set it down on the flour. Turn it over so that both sides are covered with flour. Now take your pin and thump the dough a few times on each side. I call this “waking up the dough.” I like to let it know that the main event is just ready to start.
Roll from the center away from you and leave a bit of an edge, say 1/2 inch, unrolled. Lift the pin and re-place it in the center of the dough. Now roll towards you leaving that 1/2 inch edge again unrolled. Turn the dough a quarter turn and do it all again. Repeat this until the dough is large enough to roll out from the center like spokes of a bicycle wheel. Move it around a bit to make sure it isn’t sticking on the surface.
Remember to think good thoughts.
Roll the dough only as large as it needs to be, about 1-1/2 to 2 inches bigger than your pie pan. It should be about as thick as the glass in a canning jar. If it has torn, don’t worry; we can patch it back together with a little ice water. Take a few drops and put it on the back of a patch, pat it in place and move on. Don’t obsess. We want those fats to stay chilly. Remember Rule #1. Once it is big enough, brush off the extra flour. You can use a fancy pastry brush or brush from the local hardware store. If youdon’t have one, just wad up a piece of dry paper towel and brush the flour off with that. Works just fine.
Place the rolling pin in the center of the dough and drape it over the pin. Brush off the back side of the dough and gently lift the pin and brush off the back side. Slide the pie plate on to a clean spot on your counter, place the rolling pin with the dough on it in the middle of the pan, put your hands on the wood end of the pin, and quickly and deftly, roll the pin to the edge of the plate. I can’t tell you just how much fun this is when you do it. Adjust the dough in the pan as if you are covering a sleeping baby. Dough has a memory so we don’t want to stretch it. In the baking it will stretch right back. Just let the weight of the dough ease itself down into the pan.
Filling and Finishing
OK, get your filling and pour it into the pan. You can pop everything into the fridge at this point while you roll out the top crust in the exact same way. Settle the dough over the filling, and with scissors or knife give your pie a haircut, trimming so you have about an inch overhang. Quickly turn both edges up all the way around the pan. It’s probably time to remember Rule #1. Too much fussing will just make the fats melt. Don’t worry if it isn’t pretty yet. That’s still to come. You can pop it back in the fridge to chill up for a few minutes if it is feeling a bit soft.
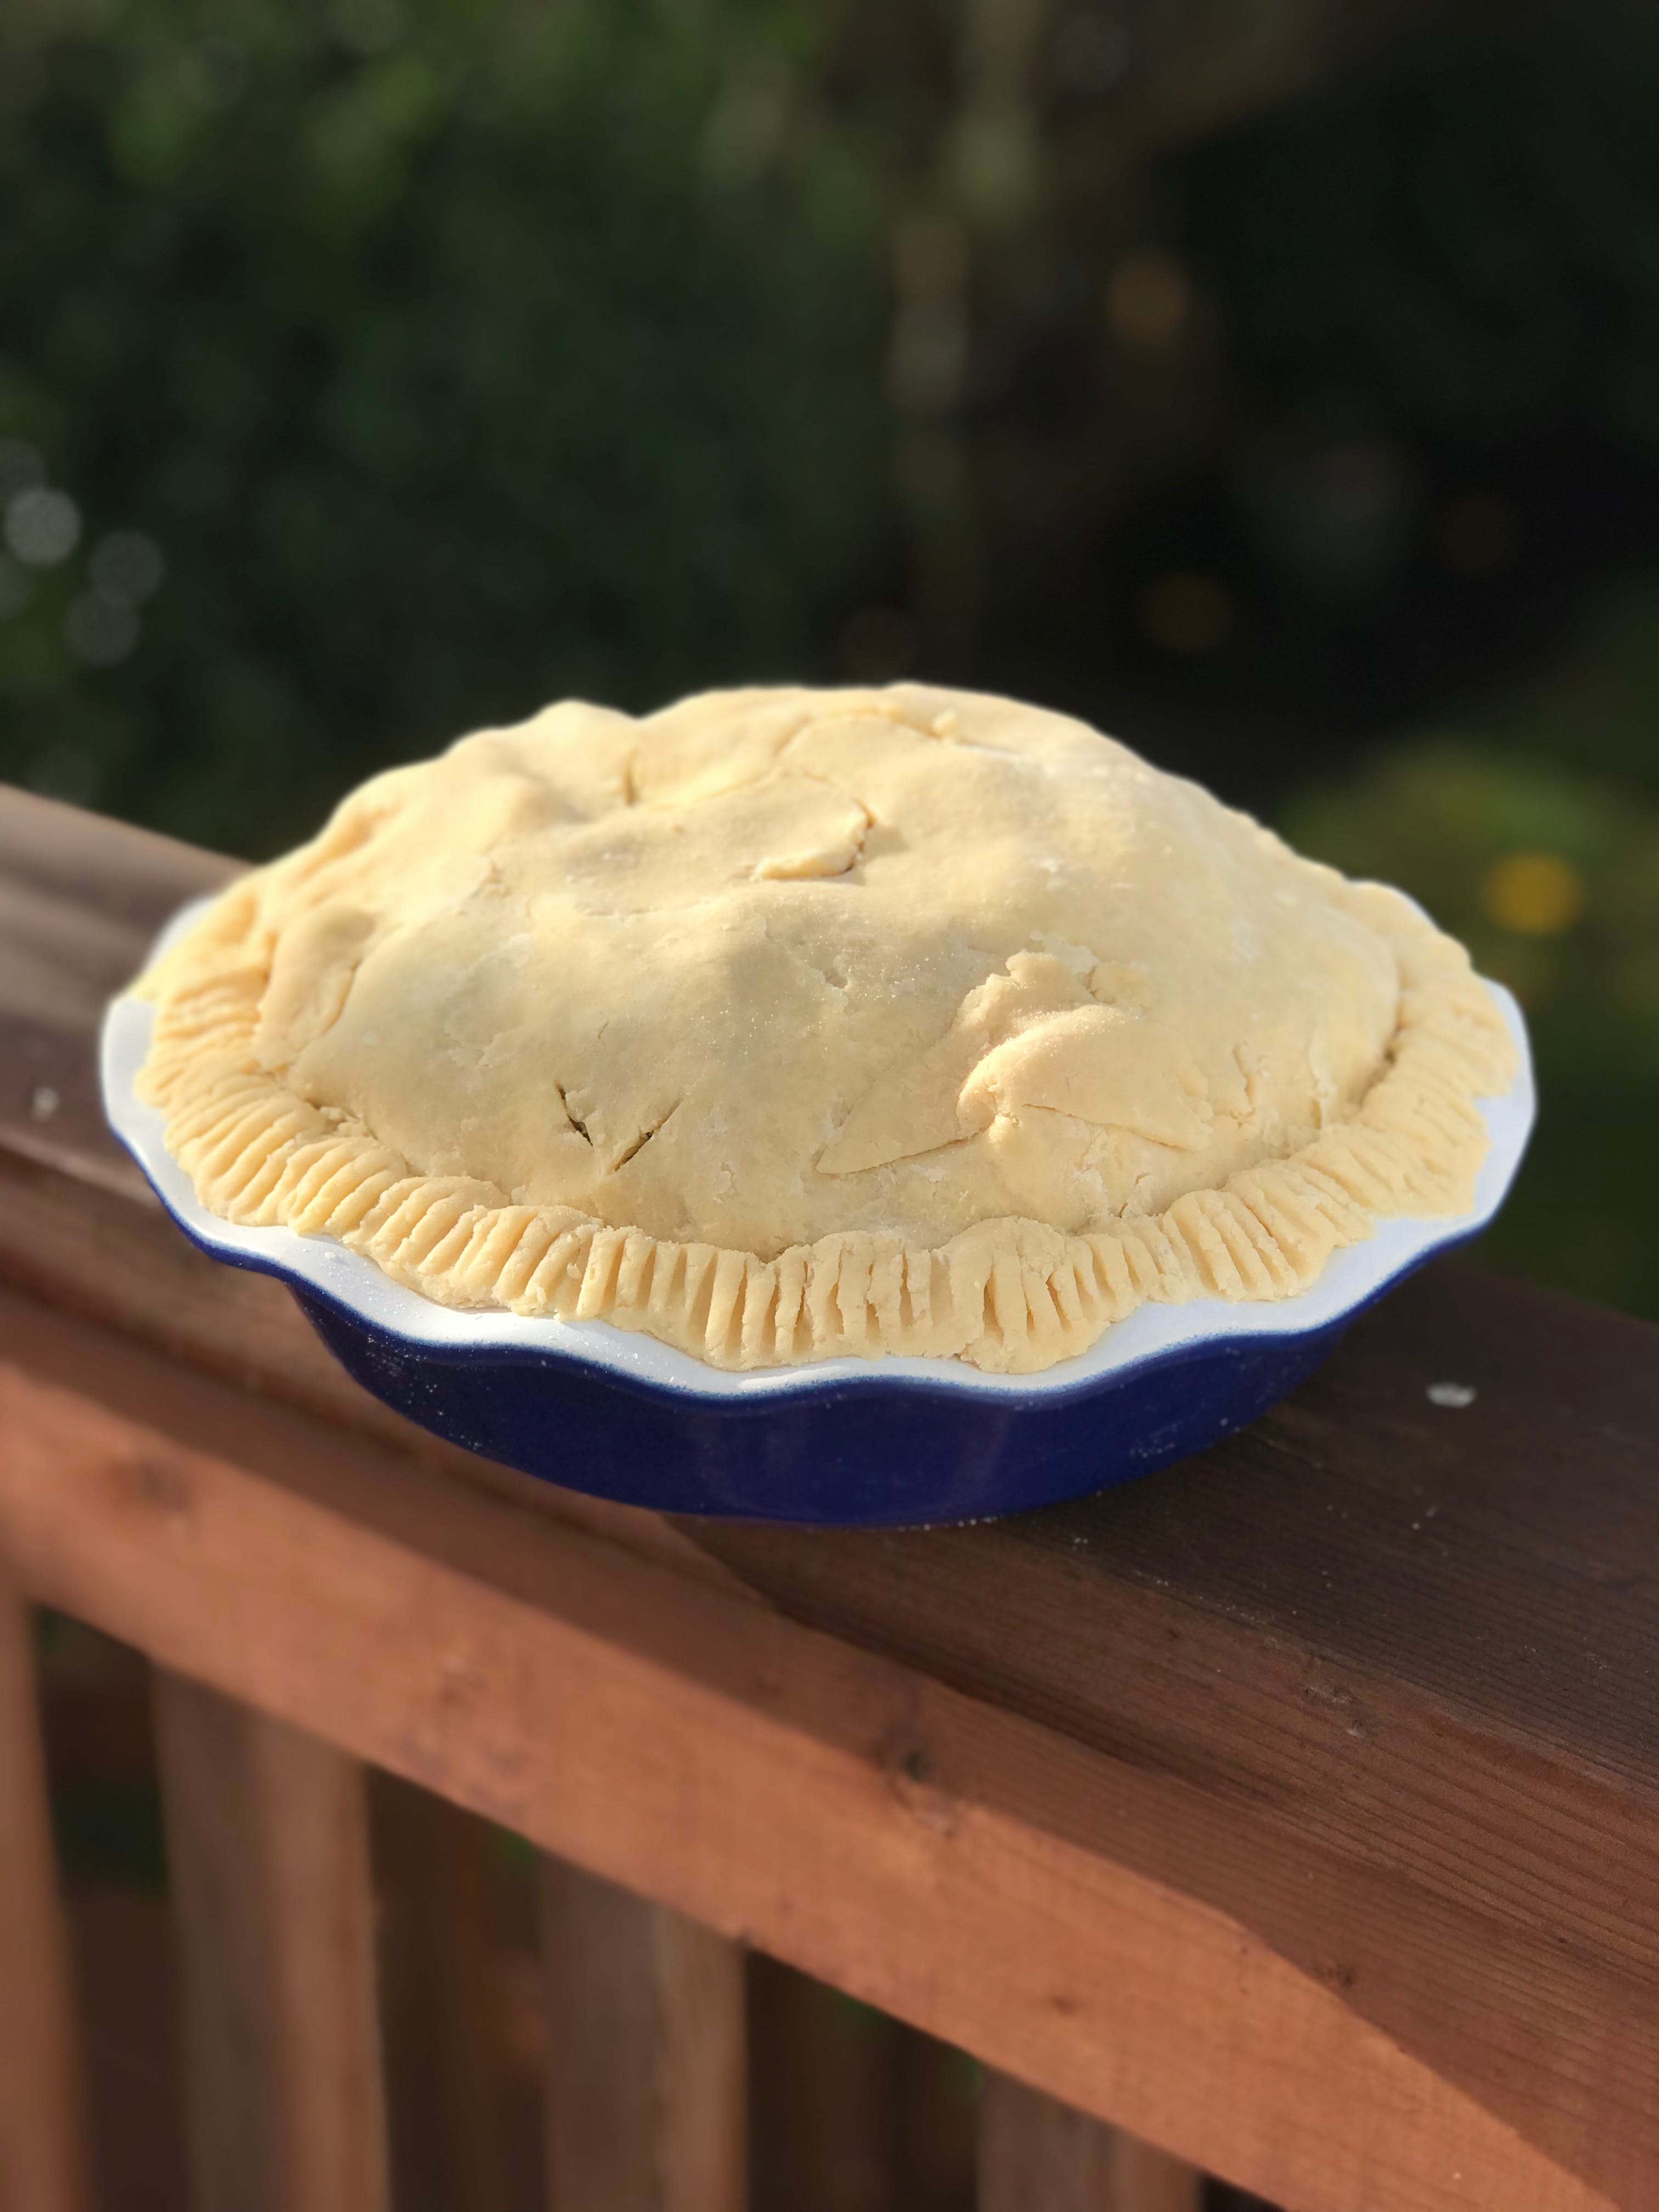
Finishing
Now, make whatever kind of edge that you want. Fork crimp? Scalloped? Braided? All are good. The main purpose of the edge and crimp is to make a sealed reservoir to keep the juices of your pie inside the pan and not on your oven floor. Cut a few vents in the top and that’s it!
I hope you might click on the little heart button to “Like” this post and leave a comment, too.
Music for Today:
Remember, all measuring equipment is NOT equal. This is what my measuring cups measured out to using King Arthur AP Flour when I first developed this recipe back in 2002.
For an all butter dough omit leaf lard and use 14 tablespoons
